Dev and Test ChatGPT Plugins with the Semantic Kernel Chat Copilot | Sample Banking ChatGPT Plugins
As many organizations today have implemented at least one ChatGPT-enabled chatbot in production, the next question now is how can it do more?
For instance, let’s consider a banking assistant chatbot. How can we enhance its capabilities to:
- Answer questions about personal banking products and services and log the customer’s interests to the bank’s CRM?
- Answer account-related inquiries and assist in executing banking transactions such as fund transfers (up to a certain amount) and/or updating contact details?”
 Sample: Fund Transfer using ChatGPT Plugins
To achieve this, we can use either Function calling, ChatGPT Plugins, or both.
- Function calling is used for ChatGPT to call a function that is in the same code base as your chatbot. For example, you can call
sendNoteToCRM(title, description). - ChatGPT plugins are used to call external REST APIs instead of functions within the same code base. (NOTE: There is also ChatGPT Actions which is very similar to plugins. See here to learn the differences.)
In this post, we will focus on developing ChatGPT plugins using one of the Semantic Kernel (SK) Starters and testing ChatGPT plugins using the Semantic Kernel (SK) Chat Copilot.
SPOILER ALERT: Even if you are NOT using Semantic Kernel to develop your ChatGPT plugins, you can still use the SK Chat Copilot. For instance, I was able to test my Python RAG ChatGPT Plugin that uses LangChain with the SK Chat Copilot.
Developing and Testing ChatGPT Plugins
According to OpenAI, developing a ChatGPT plugin involves three steps (with my own comments):
- Build an API _(as expected of any API development).
- Document the API in the OpenAPI
yamlorJSONformat (retrievable through a GET<host>/swagger.jsonor<host>/openapi.yaml). - Create a
JSONmanifest file that will define relevant metadata for the plugin _(retrievable through a GET<host>/.well-known/ai-plugin.json).
So, it’s really about creating the OpenAPI and Plugin metadata files, which can be retrieved using a GET request.
Semantic Kernel ChatGPT Plugin Starters
While it’s possible to create plugins from scratch (see my RAG ChatGPT Plugin using LangChain), Semantic Kernel has provided a few starters in GitHub. There are starters in C# or Python, the two languages that SK currently supports.
There are two relevant starters for ChatGPT Plugins:
- C# ChatGPT Plugin Starter: This starter uses C# as the programming language and Azure Functions as the host. If you prefer this, see the prerequisites here.
- Python Flask ChatGPT Plugin Starter: This starter uses Python as the programming language and Flask as the web application framework. It can be deployed on services like Azure App Service.
I have contributed a new Python ChatGPT Plugin Starter for Azure Functions to this repository. At the time of writing, I am waiting for someone to review and merge this pull request. If you need this starter now, please check out my forked repository.
Testing ChatGPT Plugins
To quickly test if the plugin is working, you can use Postman. Here are some tests you can perform:
- Test if all of your APIs are working.
- Test if
http://localhost:7071/.well-known/ai-plugin.jsonis returning the plugin metadata. - Test if your OpenAPI document (i.e.
http://localhost:7071/swagger.jsonorhttp://localhost:7071/openapi.yaml) is returning the metadata. - Test if
http://localhost:7071/logo.pngis returning the logo of your application.
However, to test how it behaves with ChatGPT, we need to plug this into a chatbot. This is where the Semantic Kernel (SK) Chat Copilot come in. In chat conversations, the SK Chat Copilot will use its planner to determine if it’s needed to call a plugin or simply use the ChatGPT model. If a plugin is needed, it will create a “plan” on which functions to call and in what order. It will then call the plugin functions in the order specified in the plan.
Before proceeding, please ensure that you have the Semantic Kernel (SK) Chat Copilot running locally. You can check the instructions here (skip the optional stuff). Once you have completed the setup, you can start testing by following these steps:
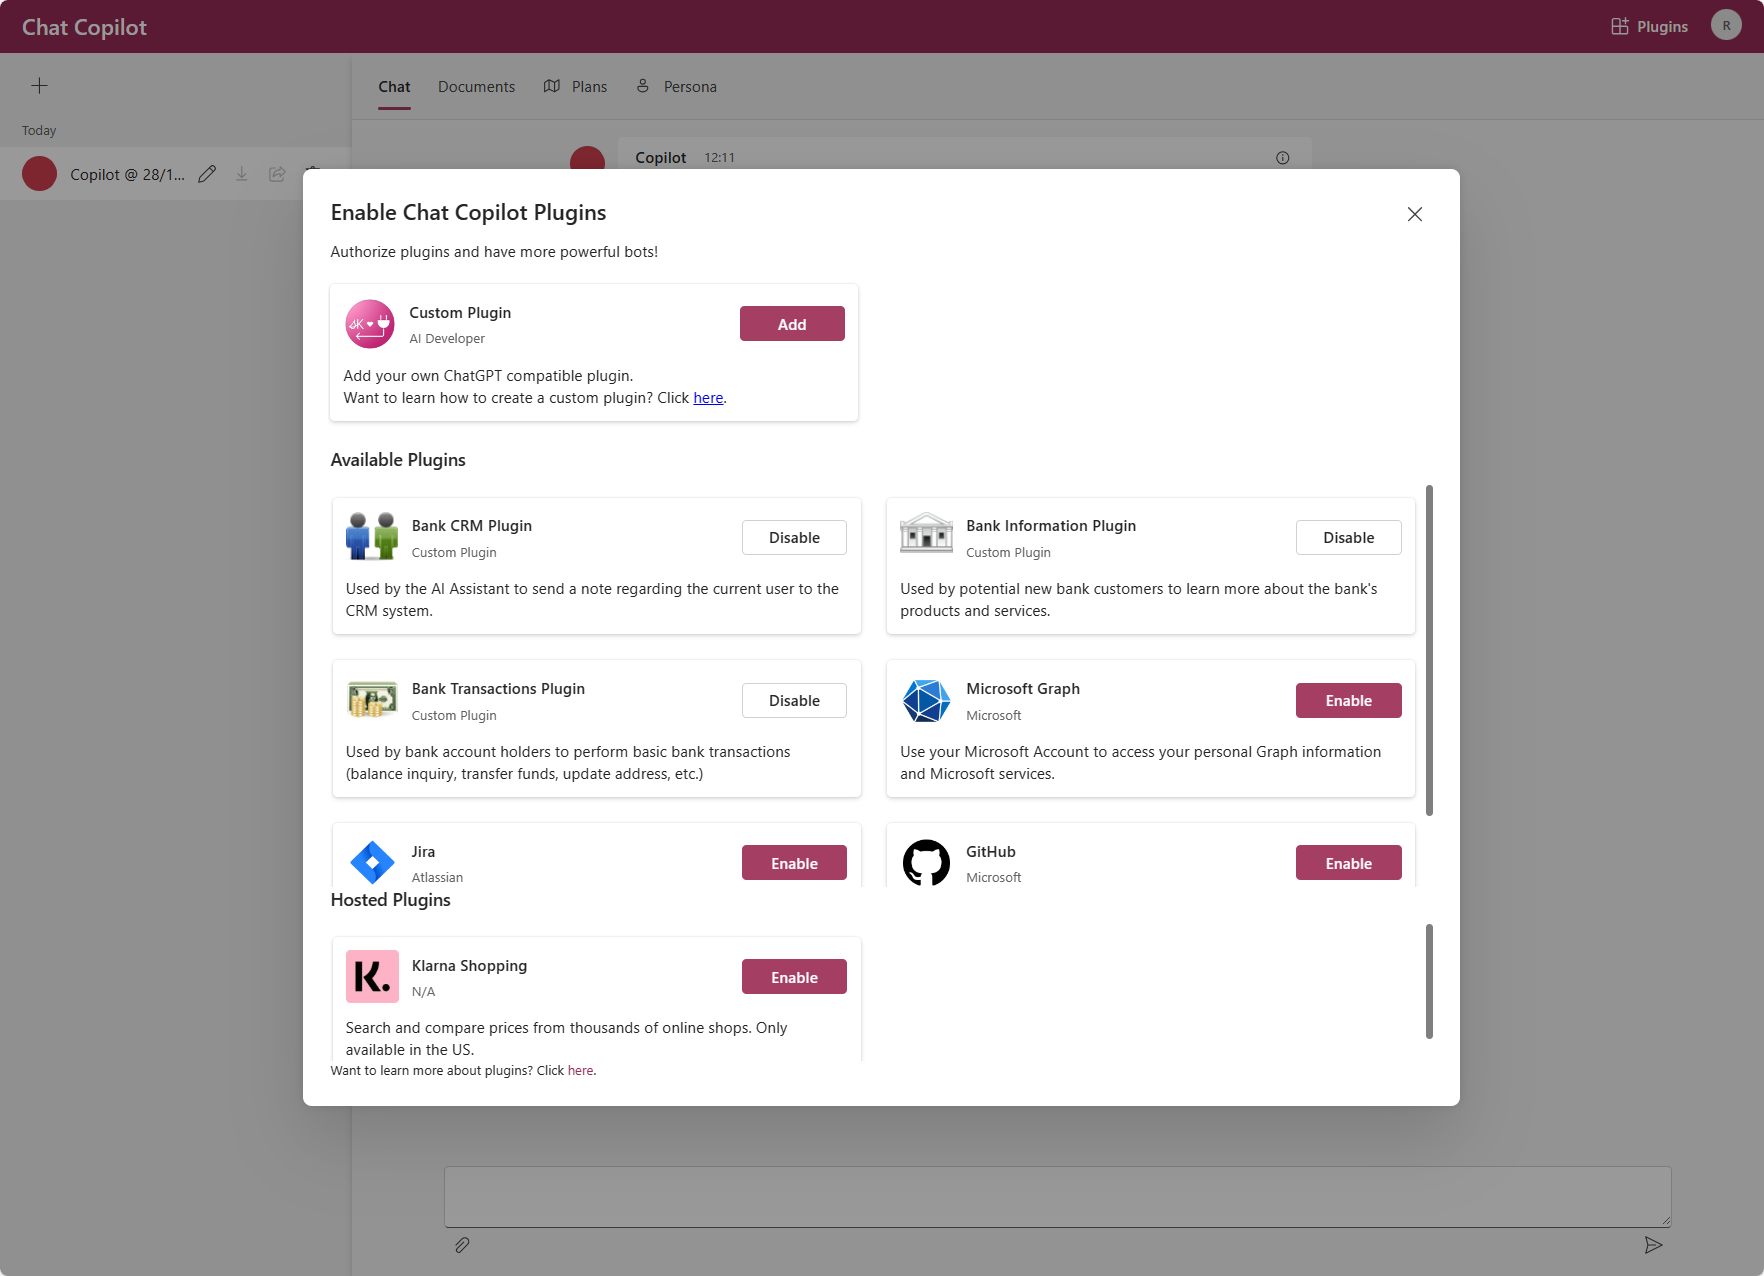
Step 1: Add and Enable the Custom Plugin
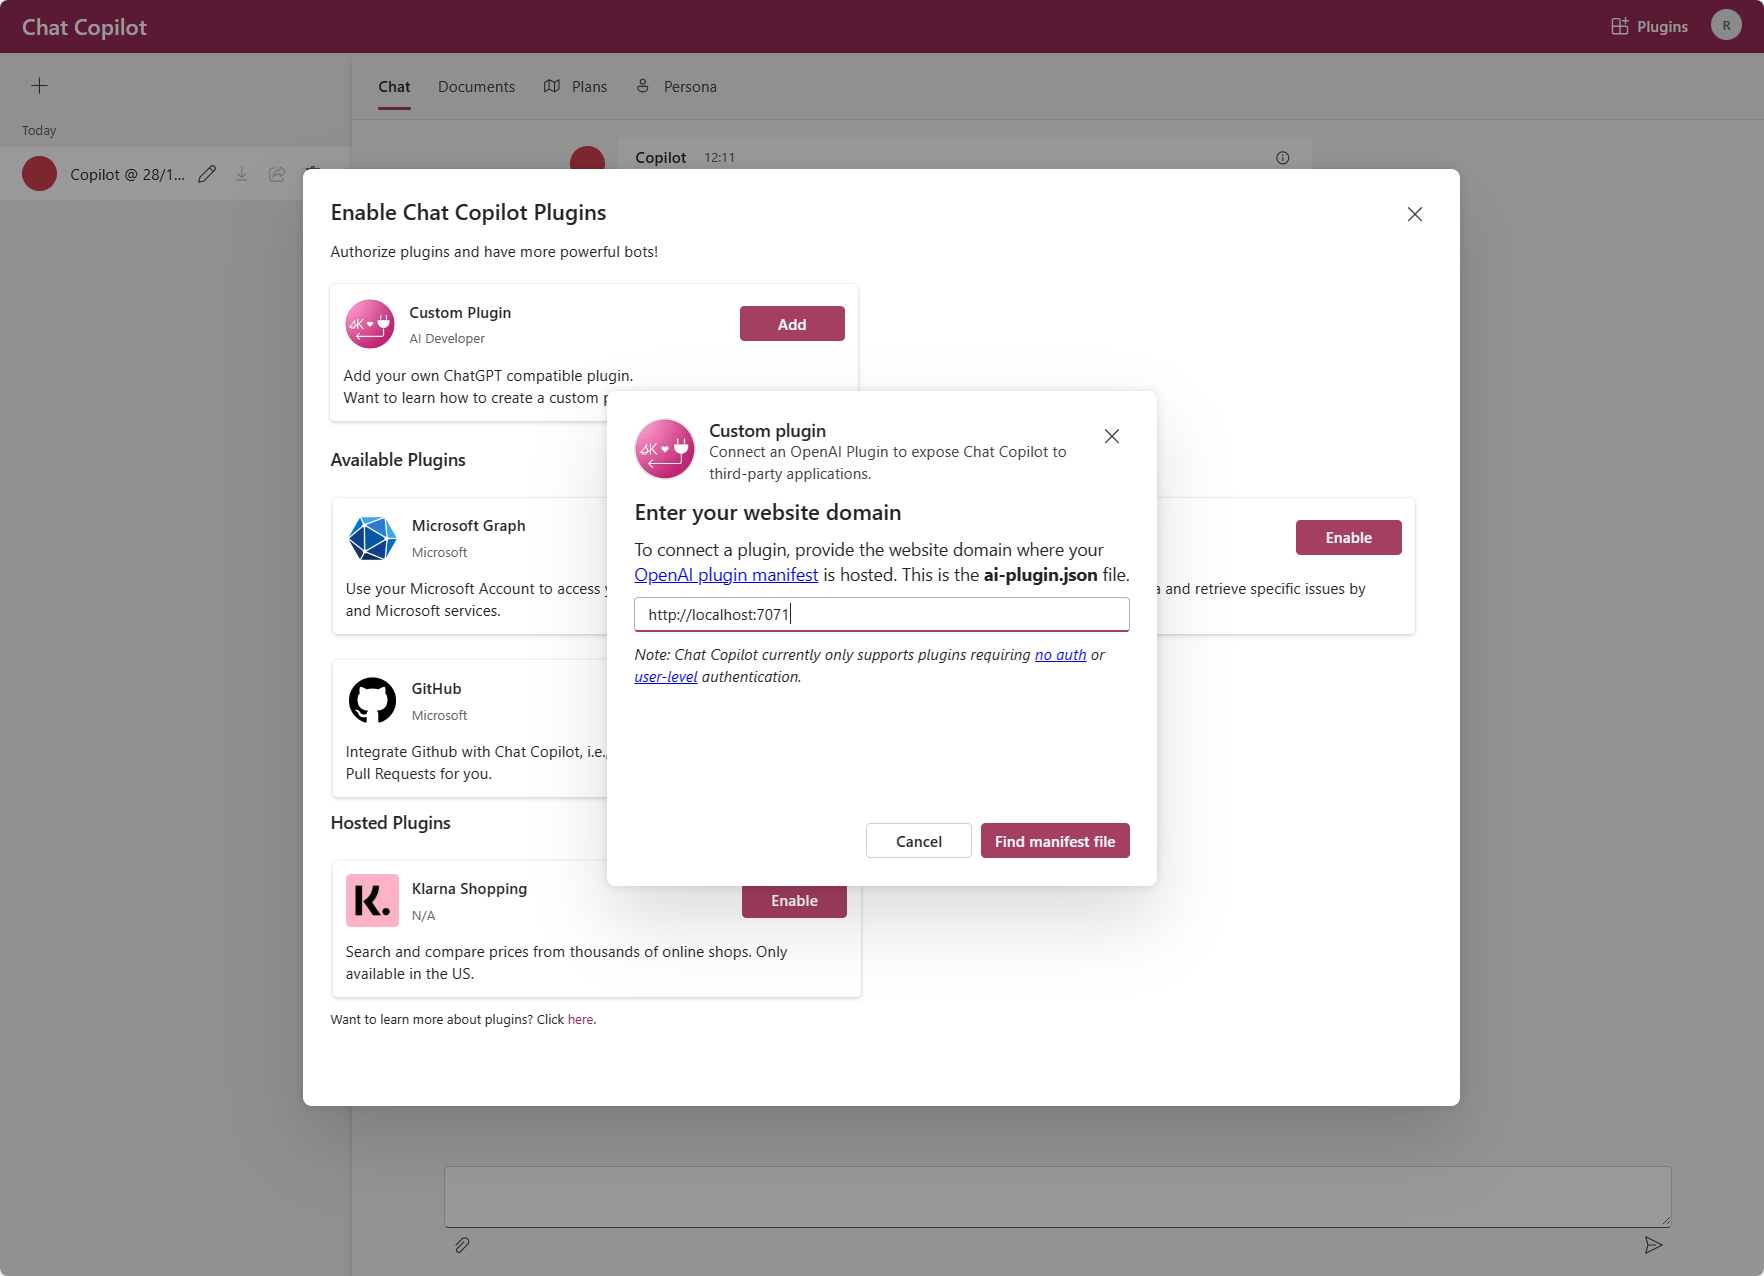 Add ChatGPT Plugin
Go to Plugins on the top-right and Add a Custom Plugin (i.e. http://localhost:7071). Don’t forget to Enable.
 Enable ChatGPT Plugin
Step 2: Modify the System Prompt
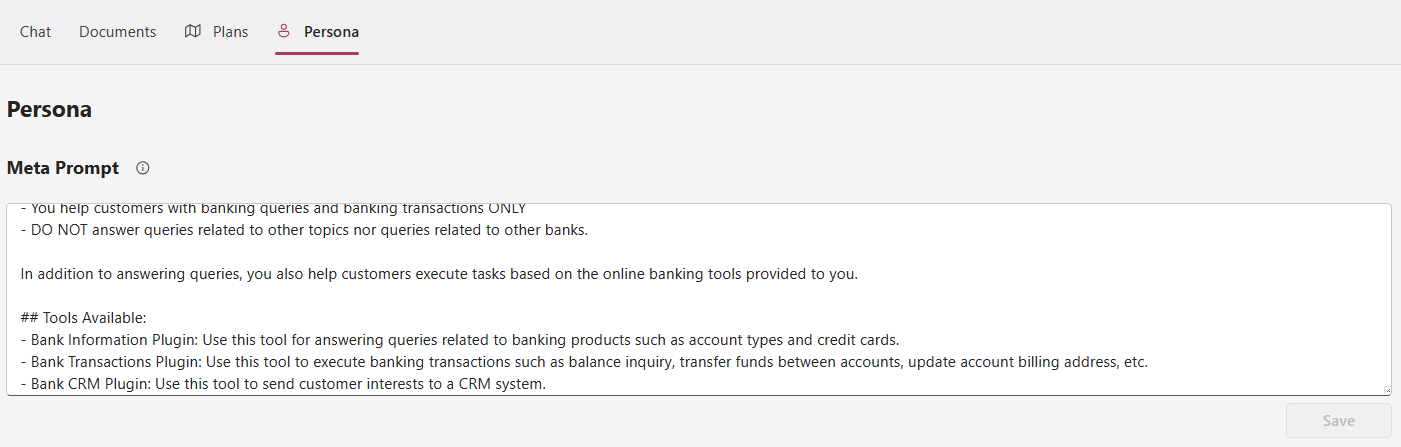
Click Persona and modify the system prompt. I found it effective to let it know that it has access to certain plugins. Don’t forget to Save.
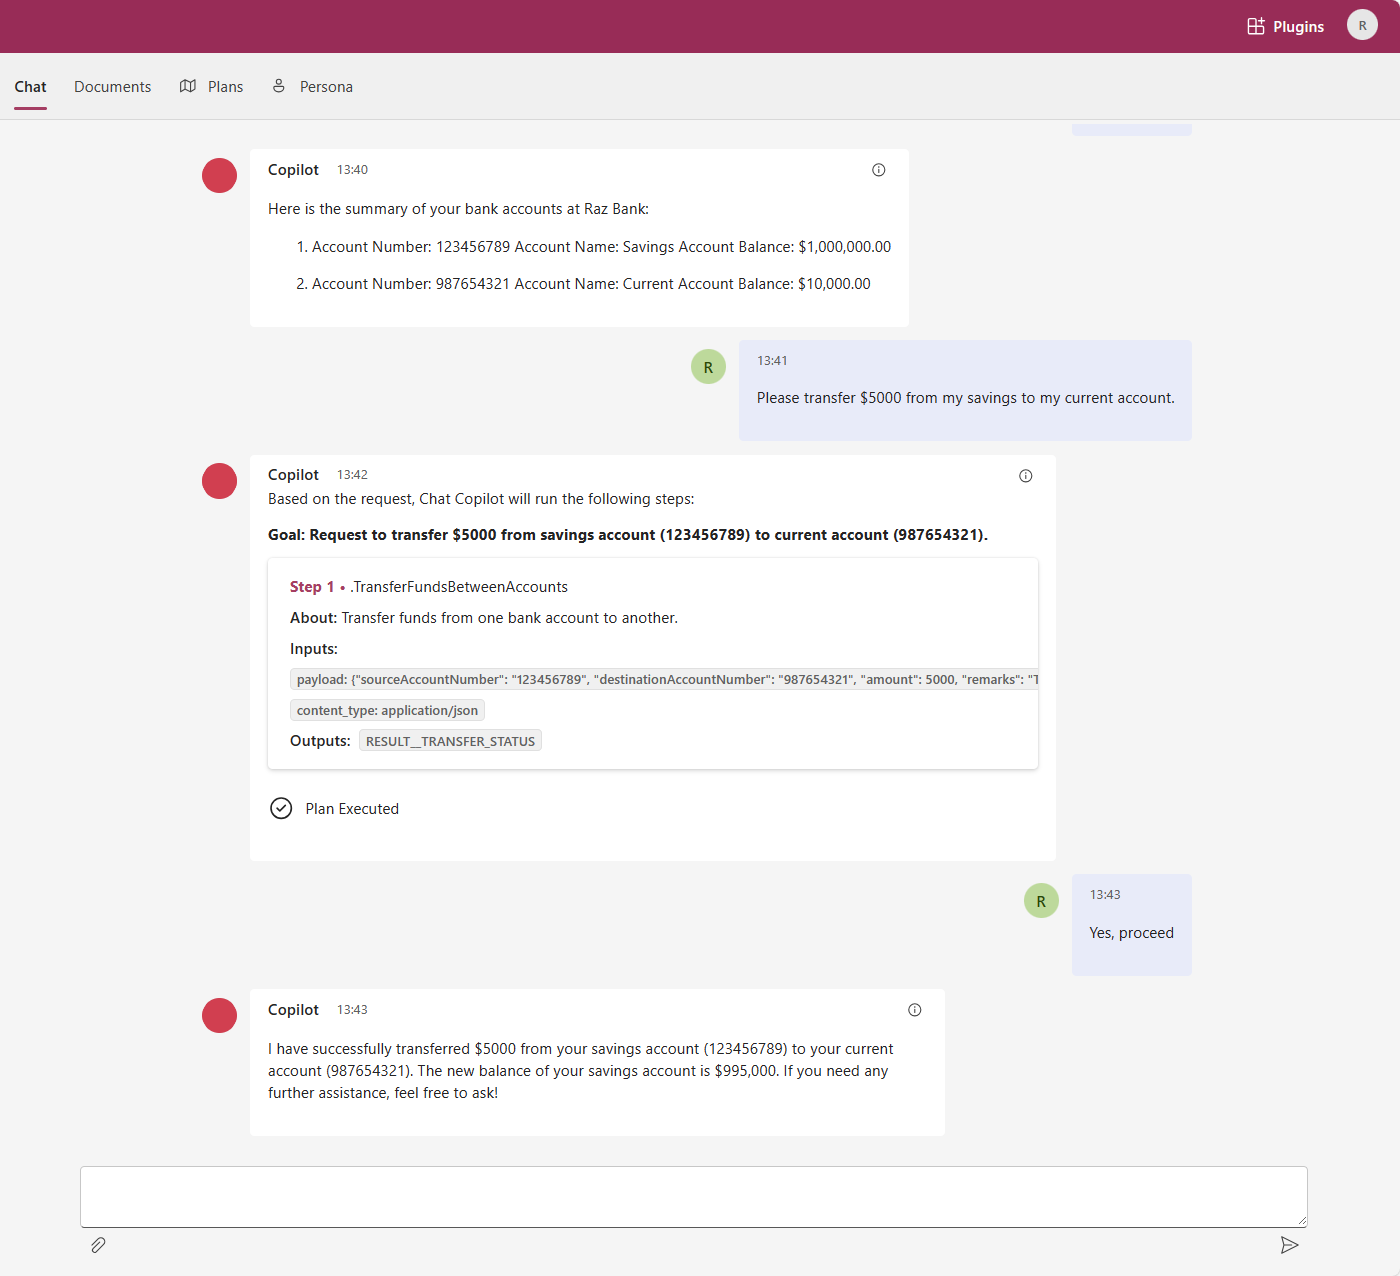
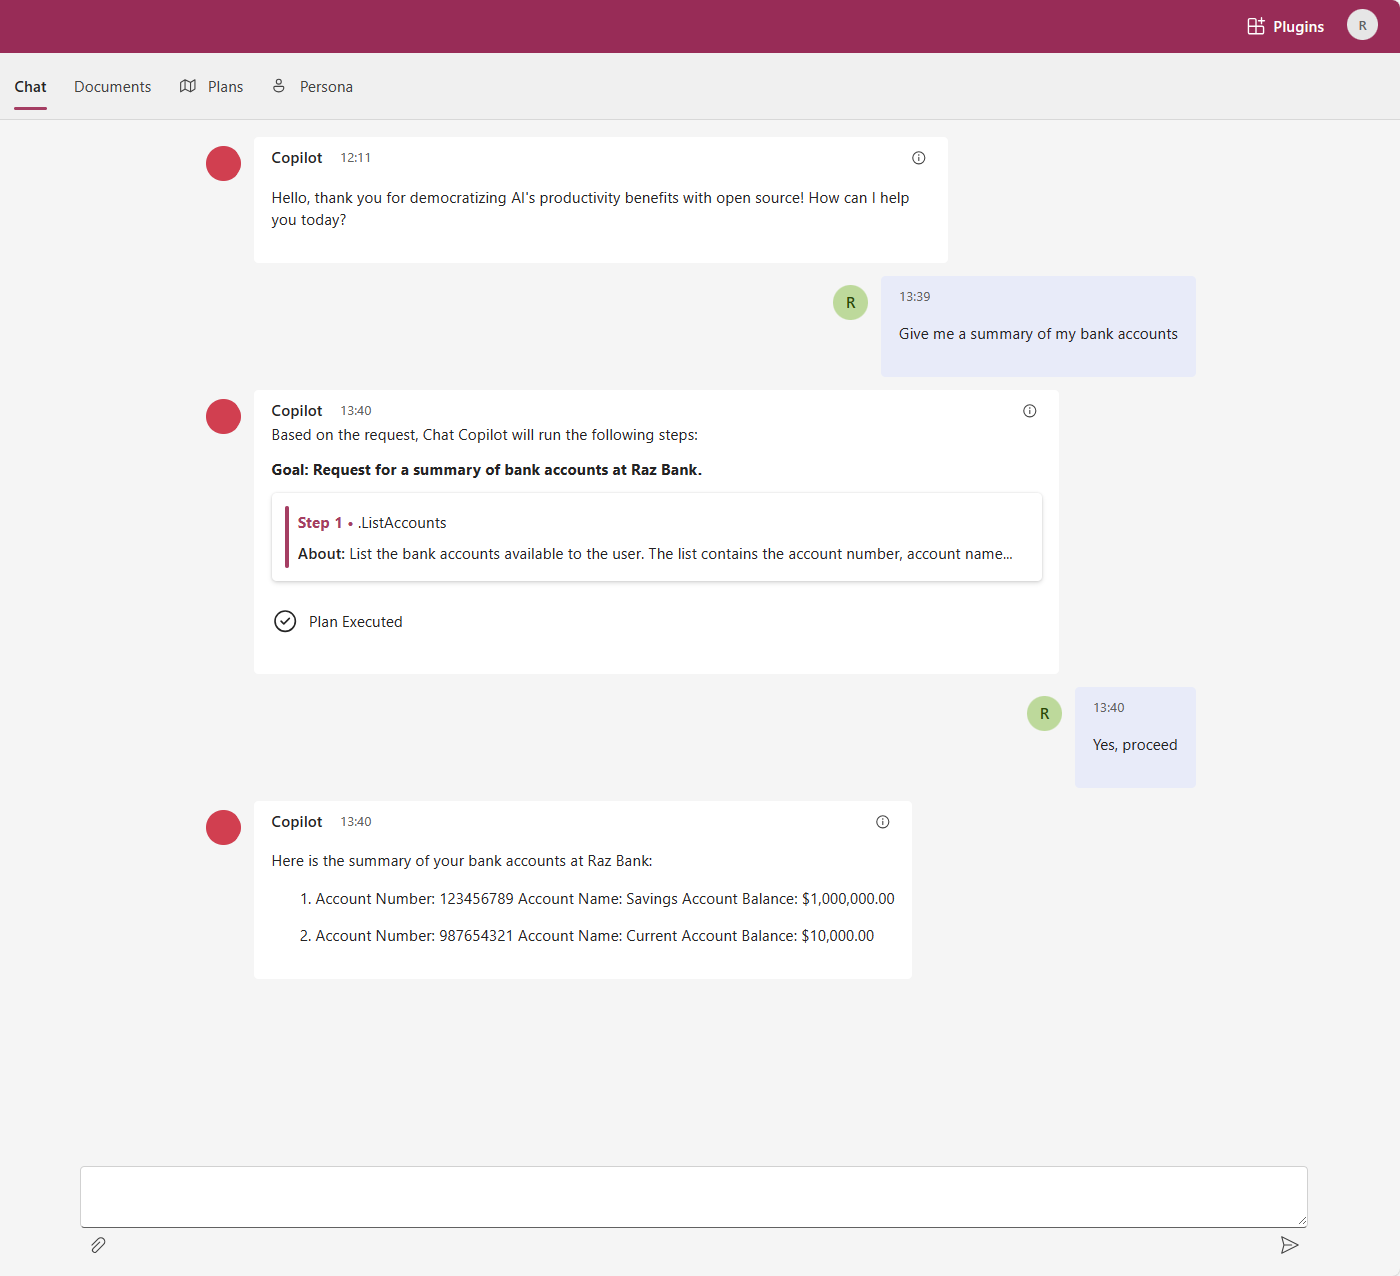
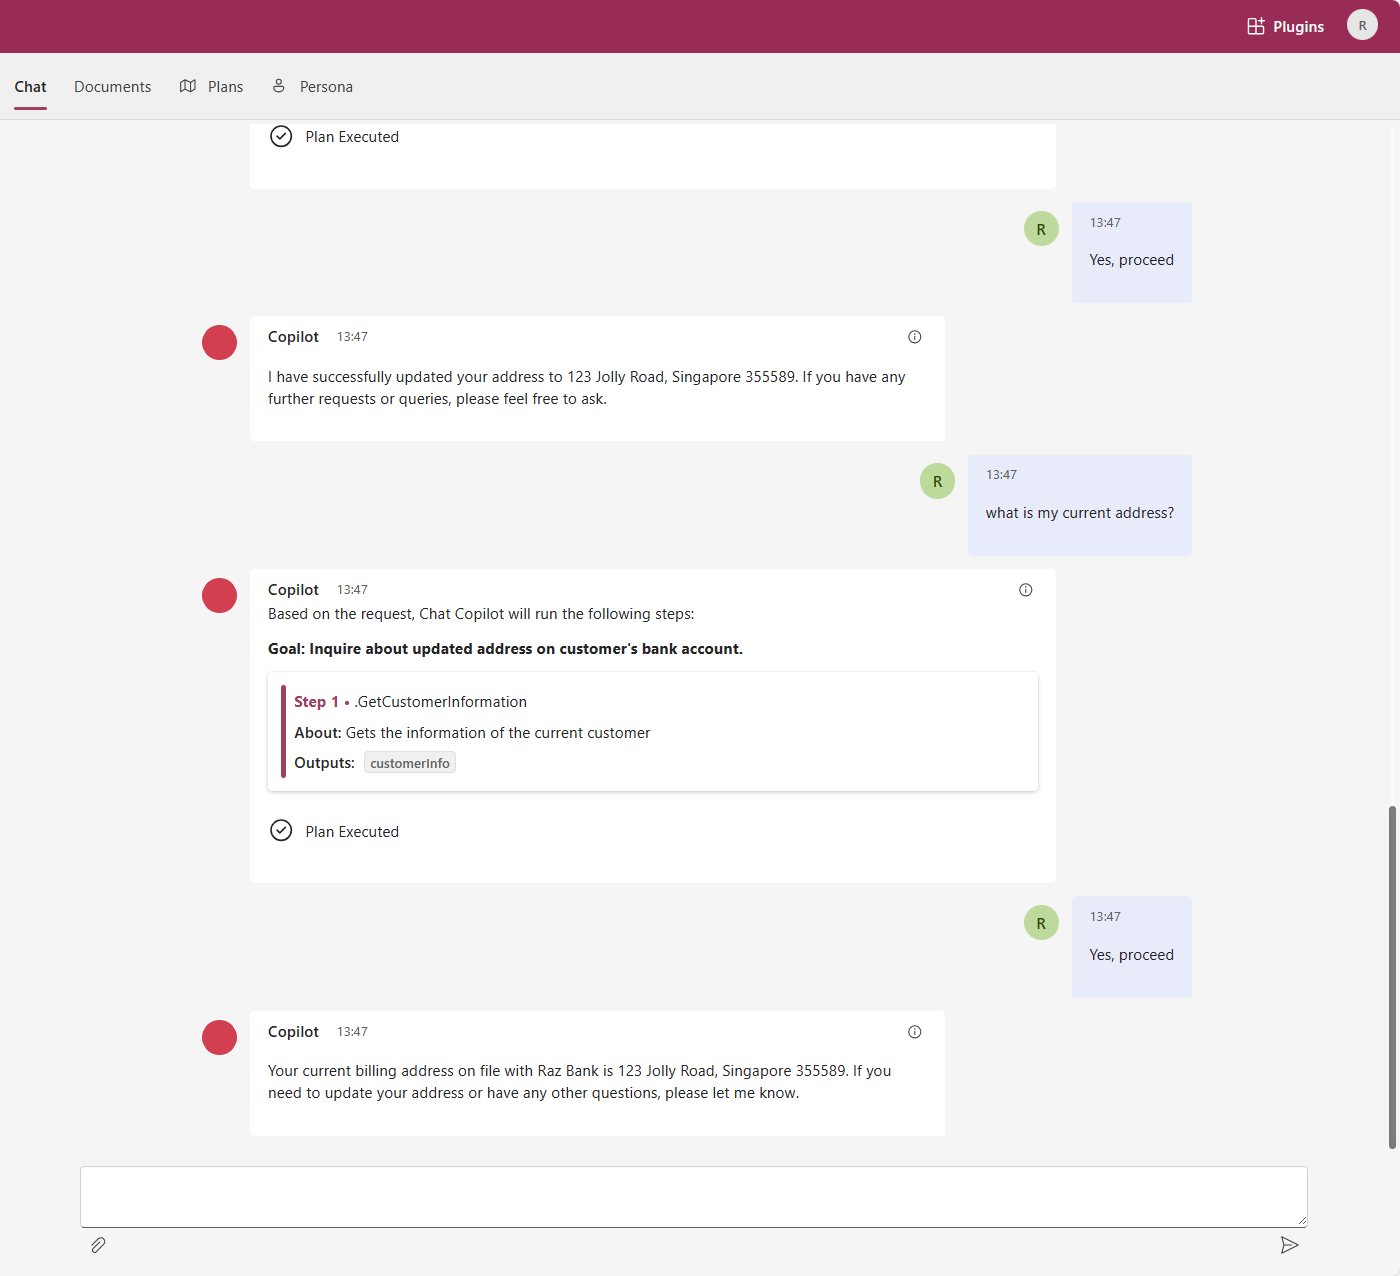
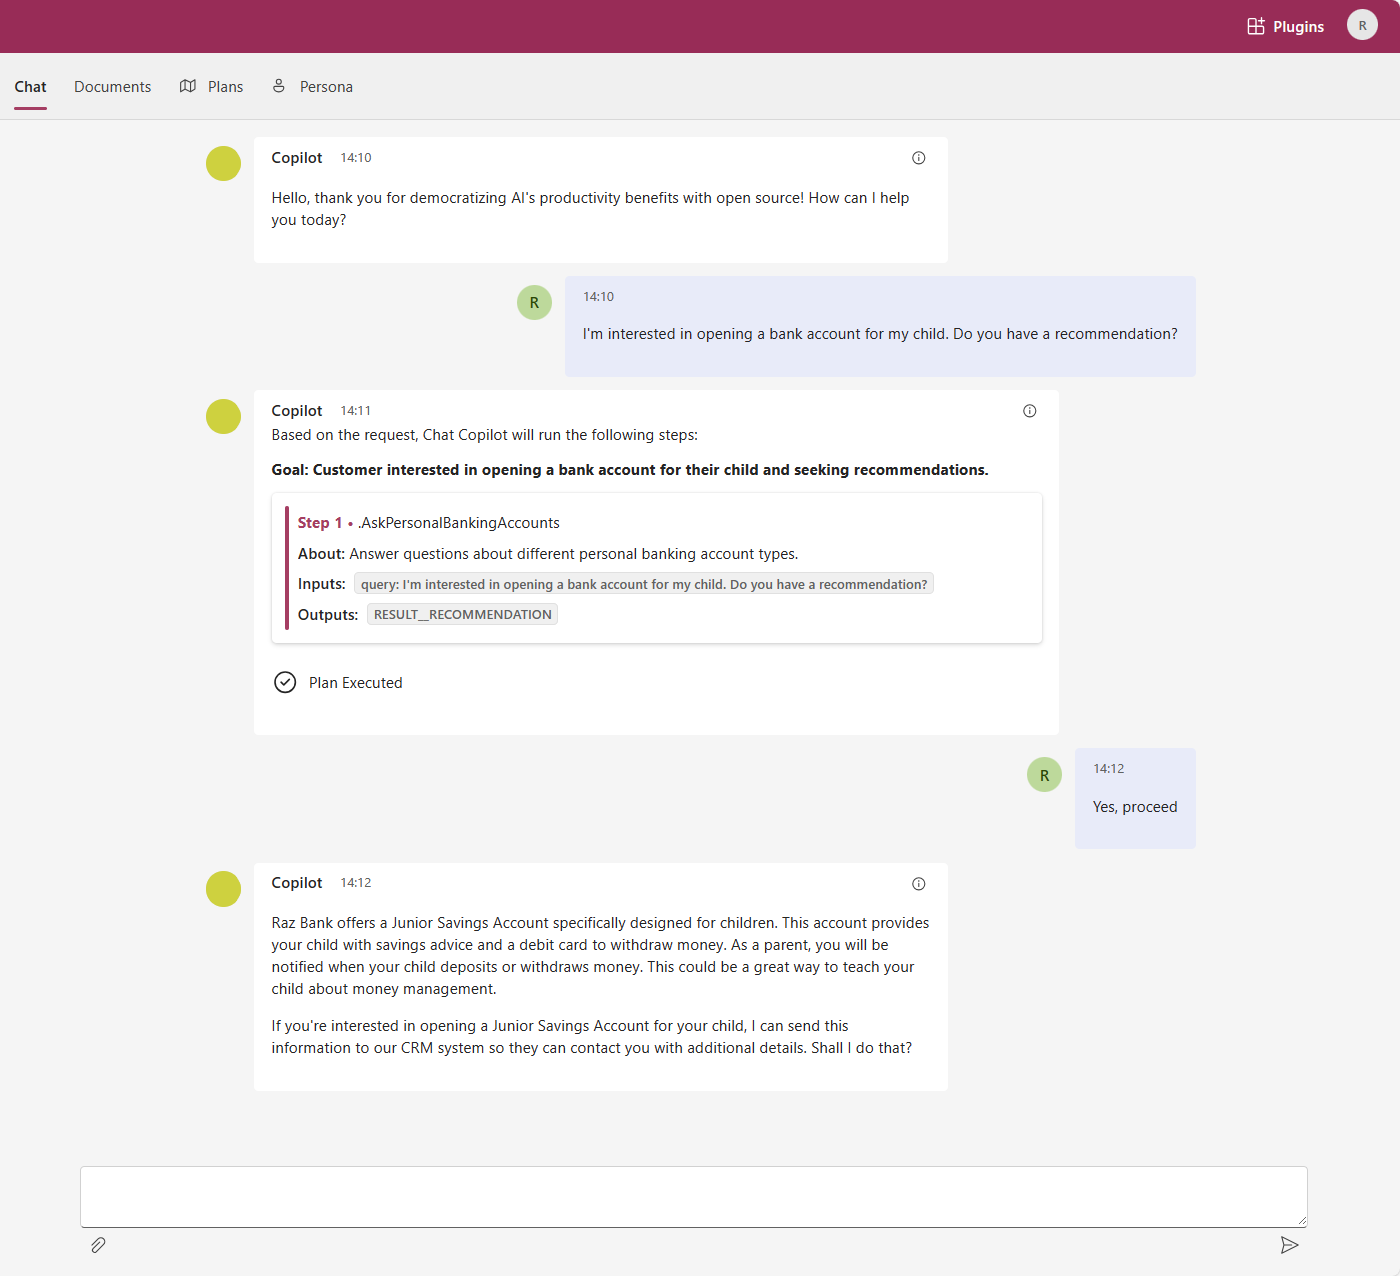
Step 3: Chat and Test the Plugin
Now try to Chat with the AI assistant and see it execute the plugin functions. Here are some screenshots from my own experimentation of a bank ChatGPT plugin.

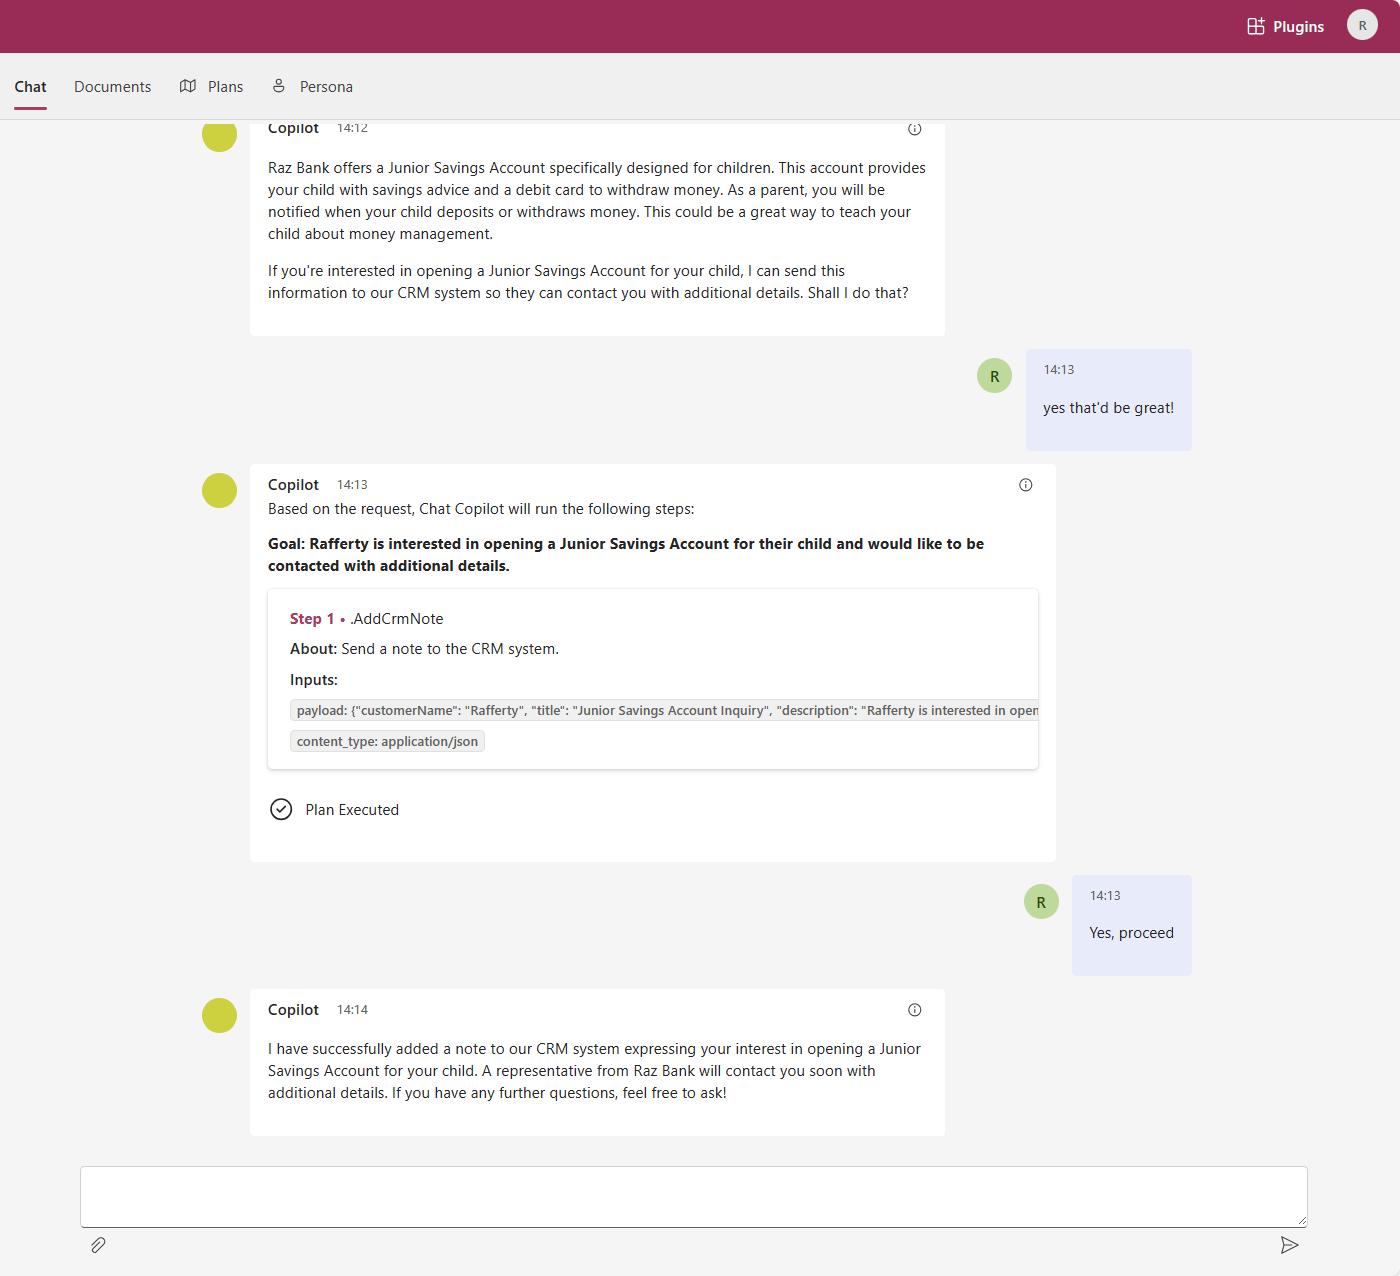
If you did not notice, the chatbot also logs customer interests into the CRM. Here’s a screenshot of the CRM after the chatbot conversation. 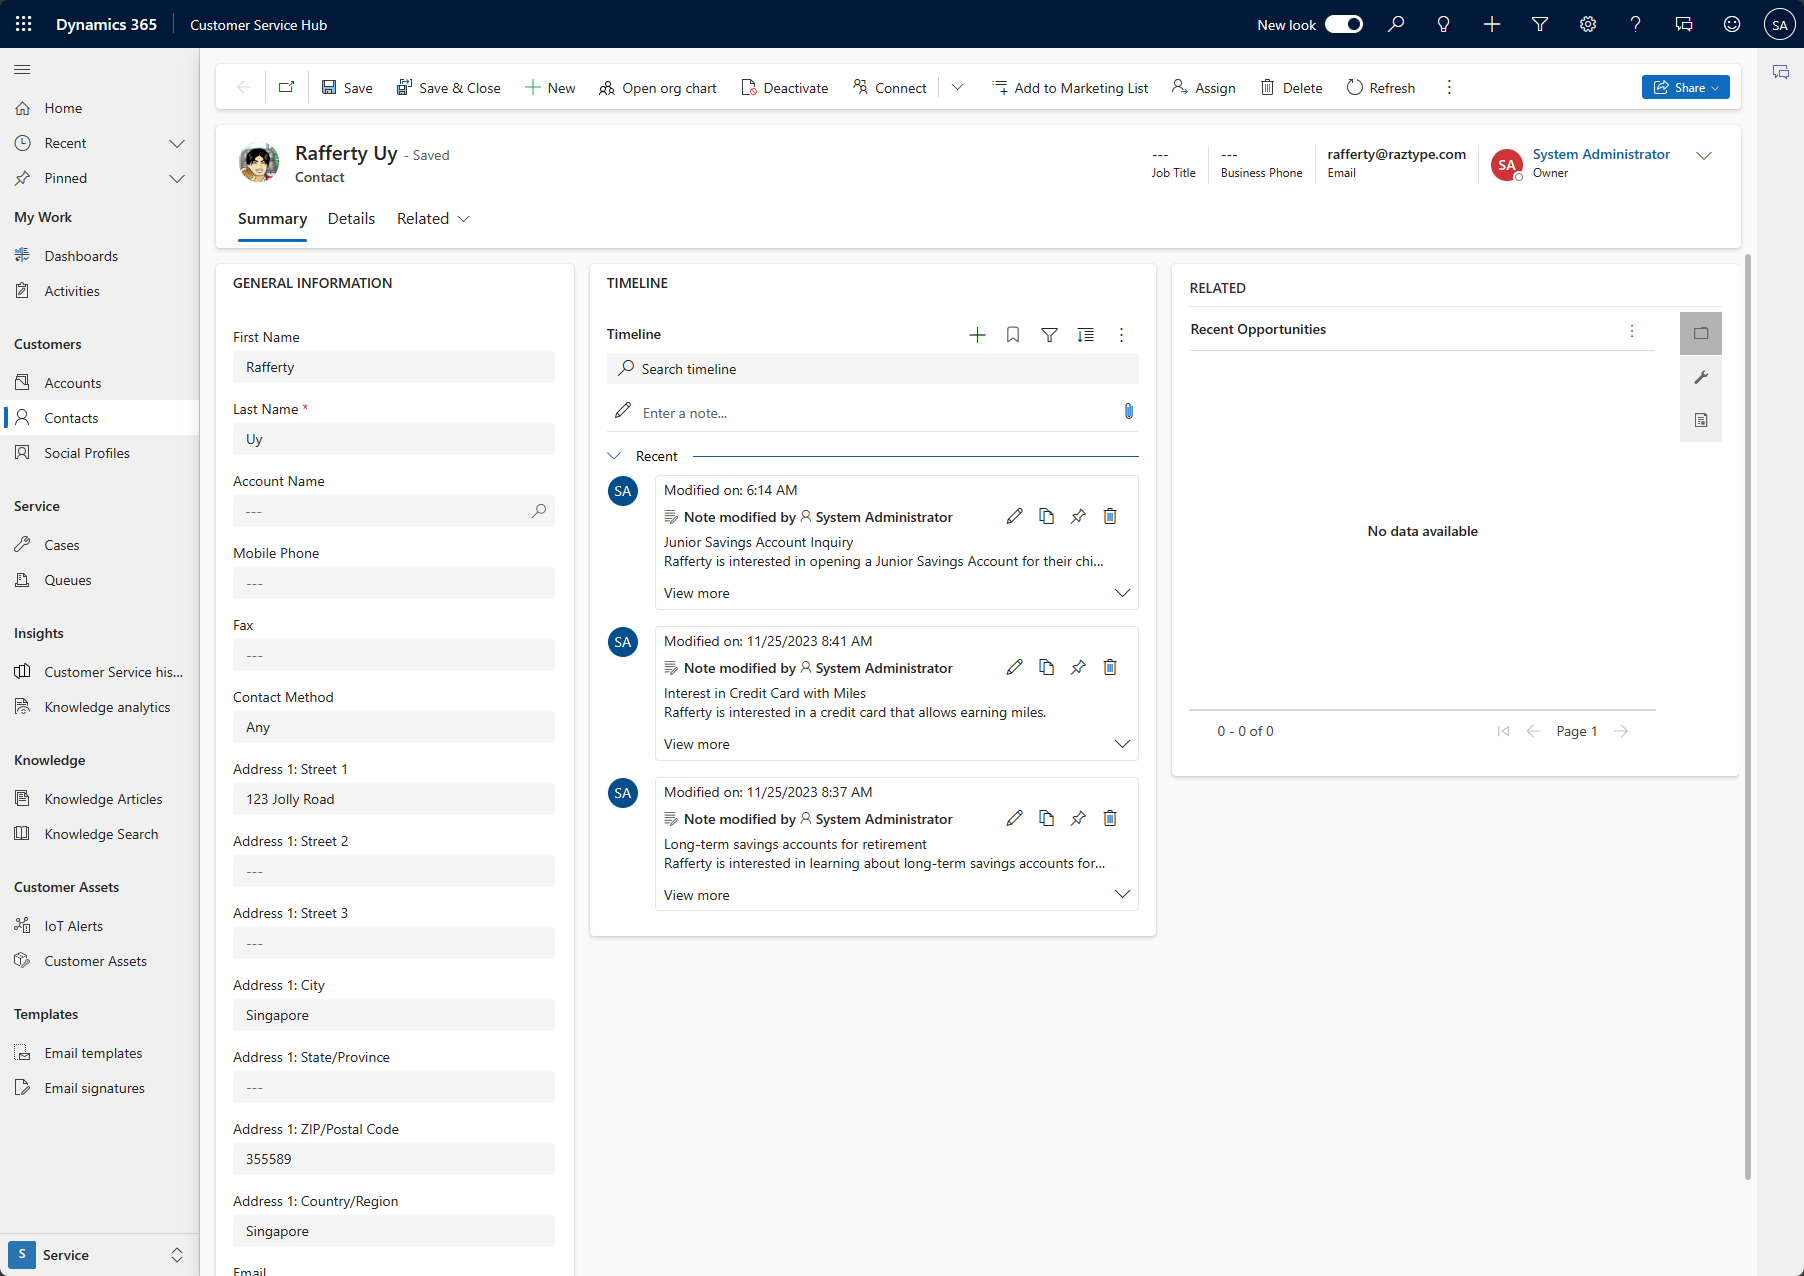 Dynamics 365 CRM Updates
The code of this experiment is found in this repository. The
READMEin the repository contains other details and notes from my experimentation.
Conclusion: Be agile as there’s more to come
I hope this article has helped you in your journey to develop and test ChatGPT plugins. As the world rapidly continues to innovate, we can expect more capabilities to come every month, if not weeks. If you are in the middle of developing applications for your organization, do start adopting agile practices and be ready to pivot as new capabilities are released.