Building Web Apps from Jupyter Notebooks with GitHub Copilot
One significant challenge that AI/ML engineers often encounter is the transition from a Jupyter Notebook—a fantastic tool for prototyping and experimenting with data—to a deployable web application that web developers can further build upon. While Jupyter Notebooks excel in the experimentation phase, transforming them into a working web app that can be further enhanced through application development requires additional steps.
GitHub Copilot to the rescue. GitHub Copilot recently introduced context variables which allow you to specify a file: to generate code from. And since VS Code supports Jupyter Notebooks, I conducted a simple experiment to see if I could generate a web application from a Jupyter Notebook using GitHub Copilot. SPOILER ALERT: It was successful!
Pre-requisites
Step 1: Create a Jupyter Notebook (skip to Step 2 if you already have one)
Another cool feature of GitHub Copilot is the /slash commands. One of the commands, /newNotebook, utilizes GenAI to create a plan and generate a new Jupyter Notebook. Here is my prompt and the generated notebook:
1
@workspace /newNotebook Use pandas to read the csv file in #file:people.csv and plot a bar graph by number of people by age group
 GitHub Copilot
 /newNotebook prompt
After clicking [Create Notebook], GitHub Copilot generated this notebook:  GitHub Copilot Generated Notebook (code here)
The code generated will not be perfect, but it will be a very good starting point. In my case, I only needed to fix the path to the CSV file and it worked seamlessly.
1
2
# Read the CSV file using pandas
df = pd.read_csv('C:/GitRepos/RazGPT/sampledata/people.csv')
Step 2: Use the Jupyter Notebook to generate a Streamlit Web App
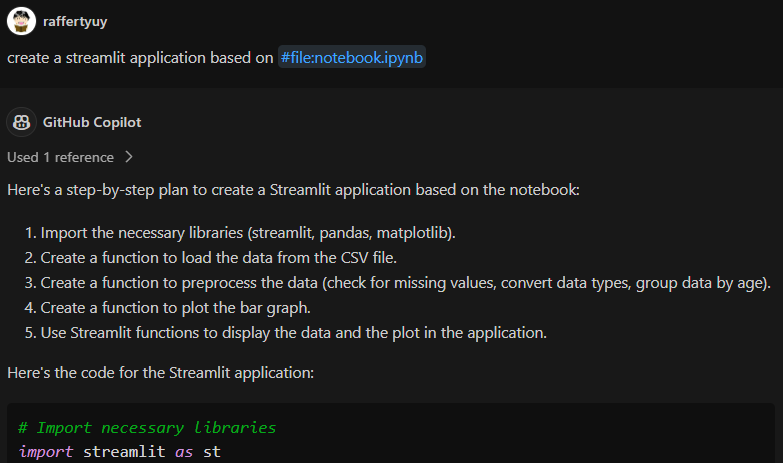
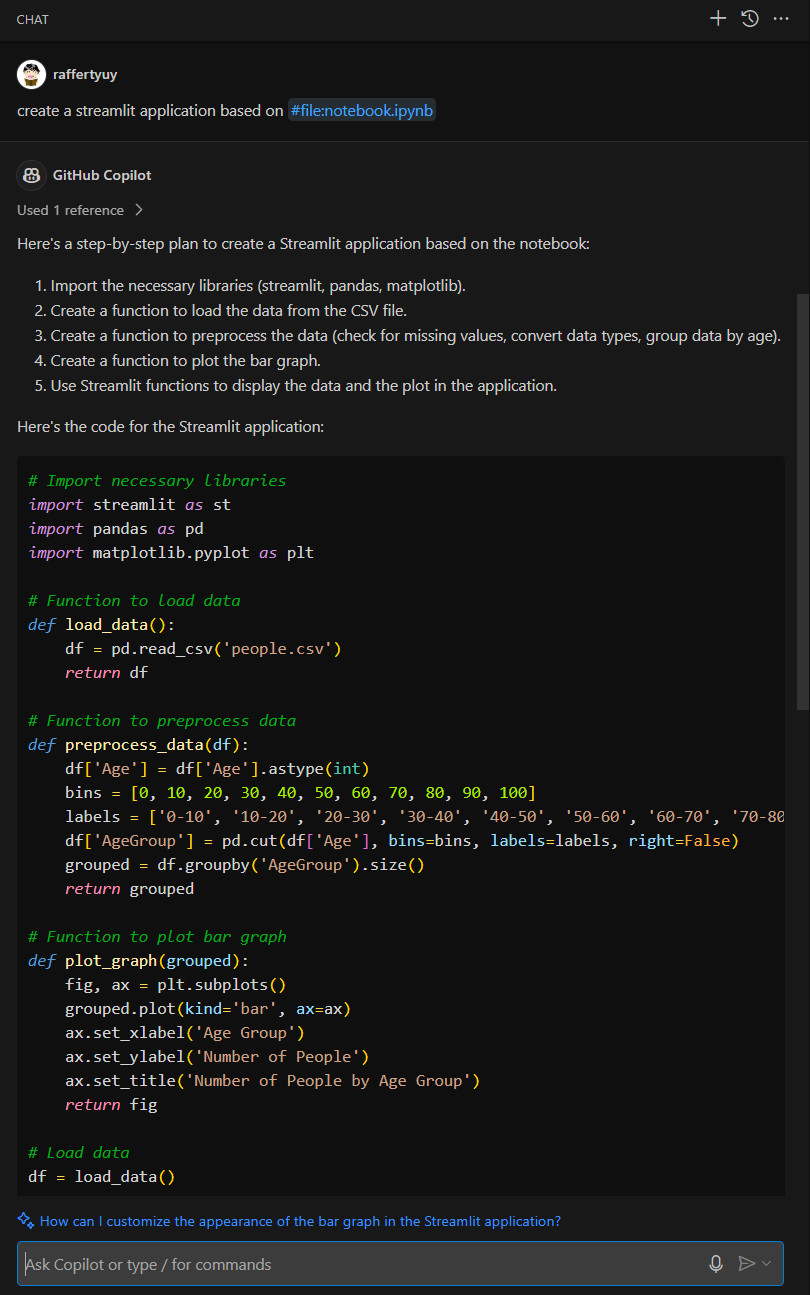
Now that we have a working Jupyter notebook, we can save it to a *.ipynb file and then use the #file: context variable to generate a Streamlit web application. Here is the prompt I used:
1
create a streamlit application based on #file:notebook.ipynb
Because I had a hardcoded people.csv path in my notebook, the generated Streamlit code also assumed this path was fixed. Using GitHub Copilot Chat, I asked it to revise the code to prompt the user to upload a CSV file instead. 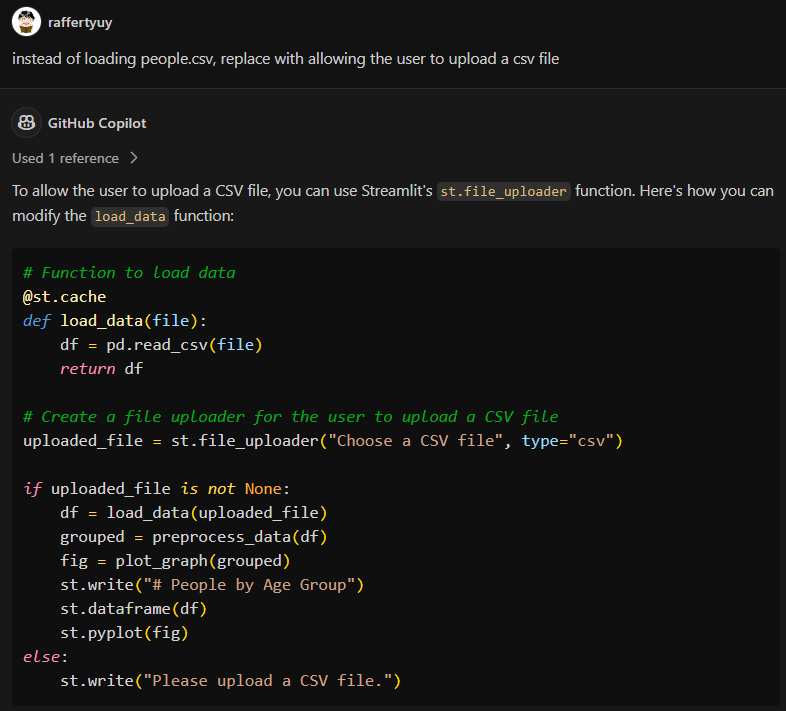
After copy-pasting the generated code into a new app.py file, I am now able to run the Streamlit web application by executing streamlit run app.py to test its functionality.  Streamlit Web App generated from Jupyter Notebook (code here)
For visual impact, I generated a Streamlit Web App for this blog post instead of a REST API. REST APIs may be more useful if you’re working with other developers; to do so, you can try this prompt instead:
Have fun!